

How to Get Rid of Tomato Blight Naturally
I've gathered together a list of the best tips for growing tomatoes. In this article, you'll find tips for growing tomatoes from seed, how to transplant them into your garden, how to prevent diseases, tips for saving tomato seeds, and more.

Tomatoes are an anomaly…
Some years they're one of the easiest things to grow, and you have juicy red fruit coming out of your ears. And then there's those other years that leave you begging for even the smallest cherry tomato from your puny plants.
It seems to be feast or famine. And the the famine years put a serious crimp on my addiction to homemade tomato soup. We can't have that, now can we?
I've been digging around a bit to increase my odds of success whilst growing tomatoes, and here are some of the best tips for growing tomatoes that I've found.
If you are one of the experienced gardeners in the crowd, then you probably already implement many of these tips. But if you are a newbie, hopefully these will increase your odds of success!
(By the way, if you're wondering where to find tomato seeds, check out True Leaf Market's huge list of tomato varieties!)

Best Tips for Successfully Growing Tomatoes
Learn the Tomato Types
One of the first things you need to do when choosing tomato plant seeds to start (or choosing tomato plants at the store) is figure out if they are determinate or indeterminate tomatoes.
Determinate tomatoes usually stop growing in height around 3-4 feet high. After that, the plants focus on making flowers for fruit. You usually get an intense few weeks of tomato crops from determinate tomato varieties, and then the plants stop producing and die. They are a great choice for canning tomatoes, since you will get a large crop for canning at once.
Indeterminate tomatoes continue to grow and produce both new leaves and new flowers. They get very tall and can quickly become quite unmanageable. However, they also produce fruit all summer and into fall until the first major frost. These are the perfect plants for enjoying seasonal tomatoes all throughout the season.
Best Tips for Growing Tomatoes from Seed
Growing tomatoes from seed isn't very difficult, but you DO need to have a seed starting system indoors. Tomatoes have a long growing season, and unless you live in a really warm, tropical climate, tomatoes should be started indoors. (Check out True Leaf Market for a huge variety of tomato seeds!).
First, you need to check out my beginner gardening tips and make sure you know your garden zone, climate, and frost dates.
Tomatoes need to be started indoors 6-8 weeks before your last frost date. Try to find the best varieties for your region. I love these seed companies and I personally prefer to grow roma tomatoes, because I like canning tomatoes and I don't really care for eating them off the vine (I know, I'm bit of a weirdo!).
Use some sort of seed starting system for light and potting soil (you can either buy your soil or make homemade potting soil). If possible, get a heating mat, because tomatoes sprout easier in warm soil. I personally just put a space heater in the room with the seedlings.
Make sure there's only one tomato in each tray spot, because tomatoes don't like to be crowded.
Tomato seedlings grow very fast, and you might need to transplant them at least once before they are ready to go outdoors. I just plant them in re-usable red cups. But if you have access to random plant containers, that works great, too. The more space you can give their roots, the better!
A few weeks before you are going to plant them outside, start slowing hardening them off and transitioning them to the outdoors. Start by putting them outside for just 1-2 hours, and then bring them back in. Add a few more hours each day and take your time! They can have sun-shock and other transplanting shock issues, but if you take your time, they get super healthy and strong.
When it' time to plant them outdoors (wait until AFTER your last frost date, when the soil is at least 60 degrees).
Dig deep holes about 18-26 inches apart. The more space between the plants, the better! Overcrowding can lead to diseases and other health issues.
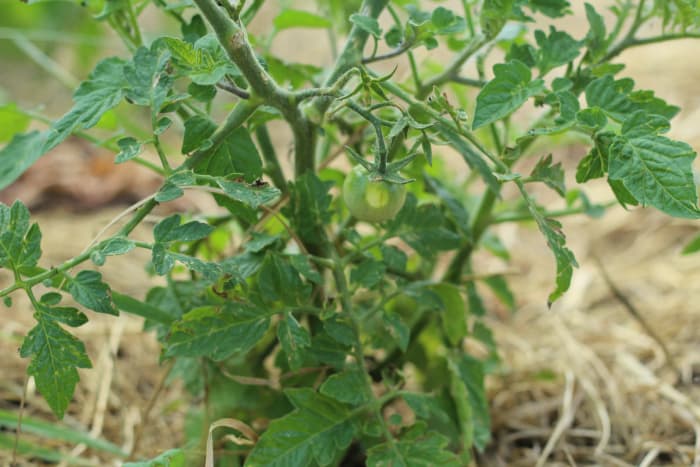
Plant deep. If you can, bury the stem of the tomato well into the ground when you transplant. The steam and leaves that are buried will end up sprouting roots, and you'll end up with a stronger plant.
Amend the hole with some crushed eggshells for added calcium. Blossom End Rot is a common problem which can be caused by a lack of calcium. A handful of eggshells at the bottom of your planting hole just might be the remedy for this trouble. And throw a bit of compost in the hole while you are at it. (Need more ideas on how to use up your extra eggshells? I've got ya covered!)
Water your newly planted tomatoes deeply to help them recover from transplant shock.
You should also consider some sort of mulch around the base of the tomato plants, as that will help keep the moisture consistent and also slow down back-splash issues on the lower leaves, which can produce fungus or disease issues. I like to mulch with grass clippings, but you can also use a live mulch like buckwheat.
Companion Plants for Tomatoes
There's a lot of info in the gardening world about companion plants. Basically, if you plant certain plants next to each other, they can provide benefits for each other.
For example, certain companion plants for tomatoes can deter pests and prevent diseases. They might improve the flavor of the tomatoes, too.
Let's take a closer look at the best companion plants for tomatoes:
- Basil: the most popular tomato companion plant. Basil can repel pests like whiteflies, aphids, and hornworms. It can improve the flavor of the tomatoes and the overall health. They also attract pollinators, if you let the basil flower.
- Borage: a beautiful blue flowering herb with a cucumber-y taste. Borage can repel hornworms, improve the overall health of your tomatoes, and improve the tomato's flavor.
- Chives: chives can repel aphids, and if you let them blossom, they can attract pollinators (you can also make a chive blossom vinegar with them!).
- Marigolds: they can repel nematodes, hornworms, and slugs.
- Nasturtiums: an edible and pretty flowering plant that discourages aphids, whiteflies, and squash bugs.
Maintenance of Tomato Plants
For optimal health, you should provide your tomato plants with regular watering, pruning, and some type of support.
- Watering.
I love using an automatic system with soaker hoses (I talk about them a bit more in my raised bed article). I used to stand outside with a hose, and this is not an efficient way to get a consistent flow of water at the base of the plants. So if you can afford it, consider getting drip irrigation or soaker hoses.
The most consistent the watering, the less likely you will have split tomatoes after heavy rains.
You should also water tomatoes from the ground up. It's best to avoid getting the leaves of the tomato plant wet if you can… (Although I've definitely used the sprinkler on my 'maters in years past…) So if you can, invest in some soaker hoses to water the plants deeply.
- Pruning.
There's a lot of debate in the gardening world about whether or not to prune indeterminate tomatoes (you don't prune determinate tomatoes). The more you prune, the less fruit you will get. BUT, you will also have a more manageable plant with stronger branches.
Also, pruning will help produce more air space between the branches, which helps prevent fungus and disease issues.
I prefer pruning some of the branches and leaving the others. I don't really follow a ratio, I just eyeball it to keep my plant manageable and happy-looking.
In order to prune, look for the intersection of the main branches. There, small sucker shoots will try to grow, producing another branch. These suckers/shoots are the ones to prune if you want to prune your tomato plants.
This post from the Urban Organic Gardener will give you all the info you need to pinch the suckers off of your plants and maximize your harvest.
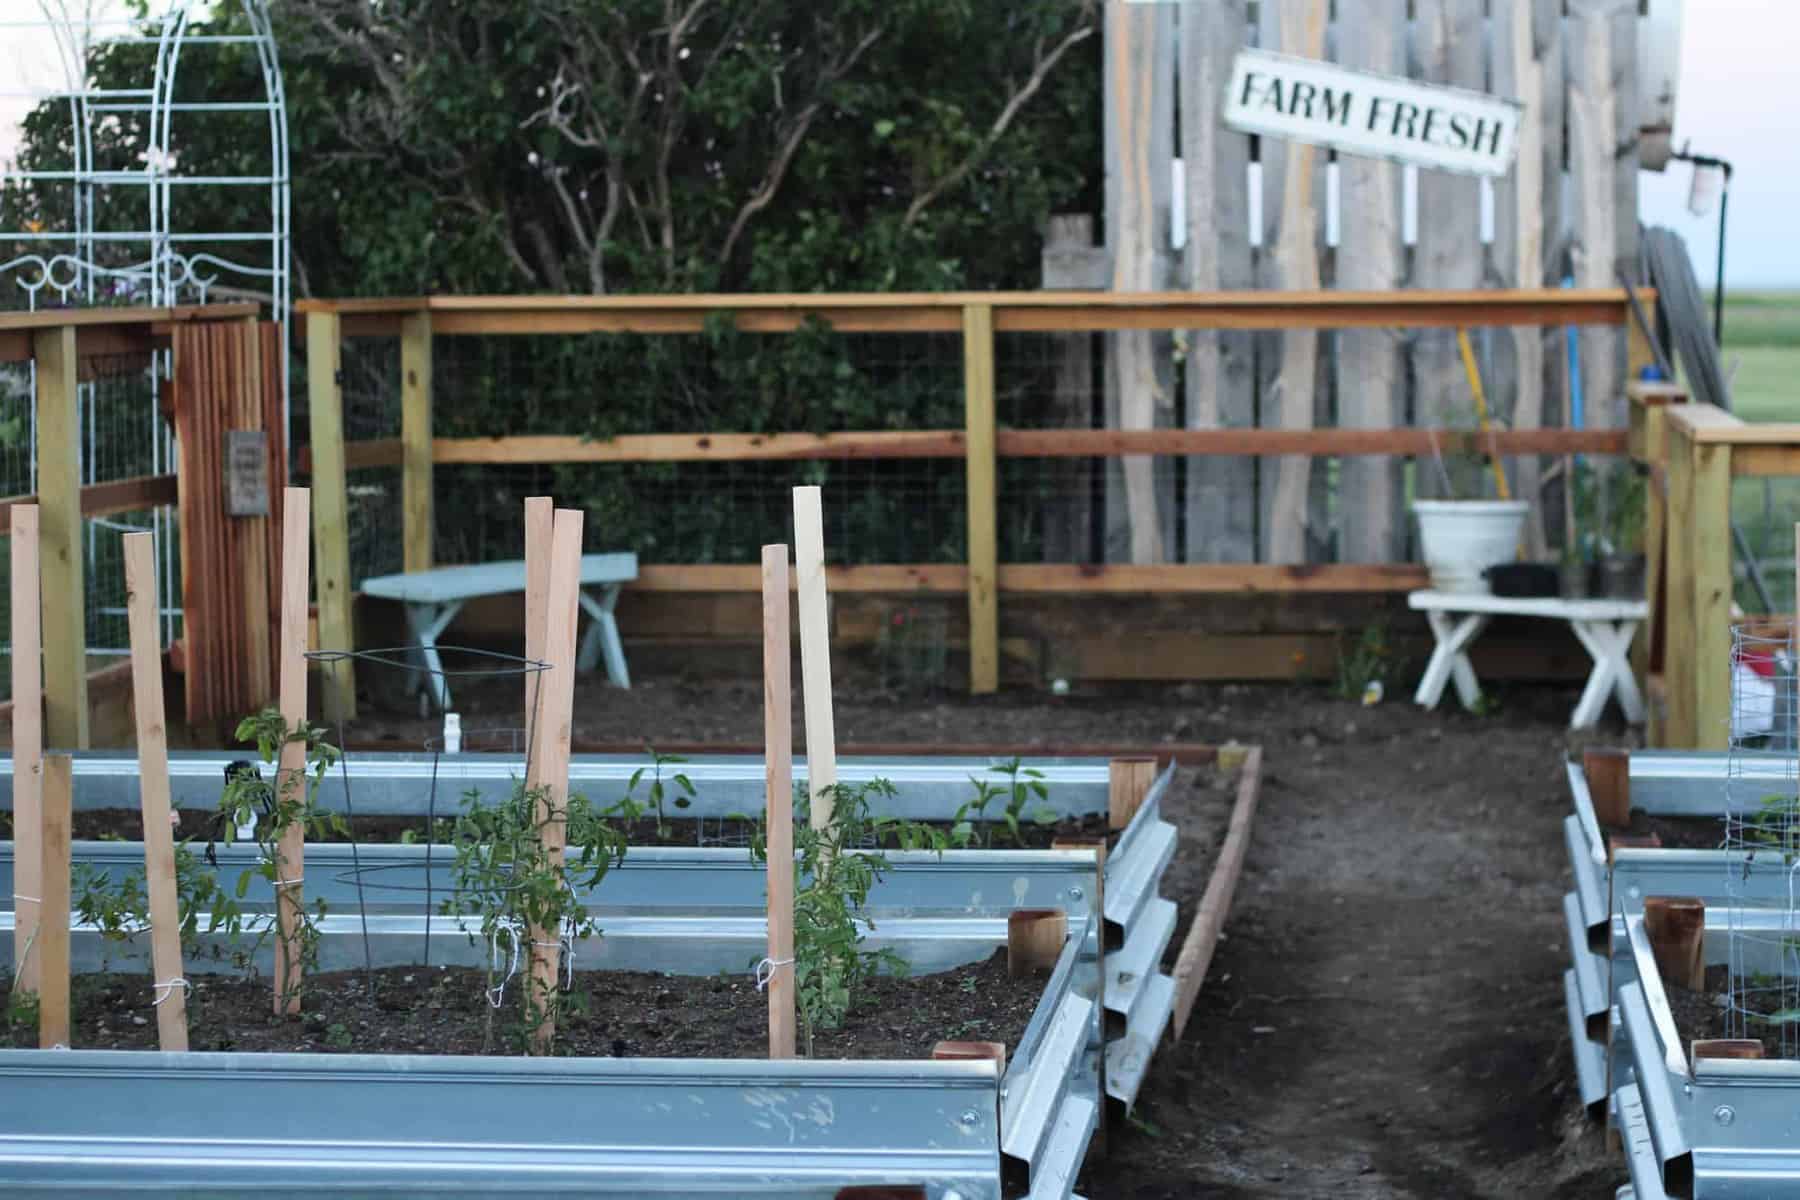
- Tomato support.
Another debate in the gardening world is about how to support your tomato plants. Should you use those tomato cages from the local hardware store? Or should you use stakes and tie your plants to the stakes as they grow?
If you use cages, try to get the heavy duty ones. They are more expensive, but they are also taller and sturdier and do much better with the weight of the tomato plants.
I use both cages and stakes. The stakes are kinda necessary with our brutal harsh Wyoming winds. I'd suggest trying some of each and see how they do for you. Sometimes gardening is all about experimenting!
You might also like experimenting with these tomato rings with your stakes.
Just make sure you give some sort of support. Tomatoes like to have something to lean on. Of course, you can purchase the wire tomato cages from the store, or go the DIY route and craft your own.
Here are a few DIY tomato cage ideas:
- A sturdy cage made from concrete wire
- Using livestock panels as a trellis
- A cage made from PVC pipe
- The Stake-a-Cage method
Feeding Tomatoes throughout the season
Tomatoes are heavy feeders, so they grow through the nutrients in the soil pretty quickly. It's always a good idea to give them a boost of compost, compost tea, or some sort of organic fertilizer once or twice a month.
Seed Saving Tips for Tomato Seeds
Want to save money on next year's tomatoes? Good news: saving tomato seeds is super easy. The only thing you need to realize is, unlike most other veggies that you can save seeds from, tomato seeds have an additional step with fermentation.
The fermentation stage for tomato seed-saving helps you have a better germination rate because it gets rid of the casing on outside of the tomato seeds that prevents seeds from sprouting.
In order to save tomato seeds, you must use an open pollinated (OP) or heirloom tomato variety. Many hybrid varieties, while delicious, cannot be seed-saved because the characteristics of the next generation won't be the same.
Here's how to save tomato seeds:
- Slice a garden tomato in half. Scoop out the seeds and pulp.
- Place the seeds/pulp in a mason jar and add a little bit of water.
- Stir it to loosen the pulp from the seeds.
- Cover the jar with a cheesecloth or towel. You can also just lightly put the top on the mason jar and just don't screw it tightly. You basically want a little bit of air circulation but a way to keep the bugs out.
- This is important: label the jar with the tomato variety!
- Put the jar in a warm place, like on top of your refrigerator. Try to find a good place that's at least 70 degrees Fahrenheit.
- Every day, remove the cover and stir the seeds/liquid. Then cover lightly and put it back.
- Repeat for 5-7 days, until most of the seeds have sunk to the bottom when you stir and there are signs of fermentation, like a white mold on the top (this mold is harmless) and a fermenting smell. There might also be bubbles in the jar, too. The seeds that still float are not viable seeds and need to be thrown out.
- Once this fermentation step is noticeable, remove the seeds (otherwise they might sprout). Rinse the seeds in fresh water. Fill the jar with clean water and the seeds, and then stir. The best and most viable seeds sink to the bottom and the others float to the top. Remove the floating seeds and drain out the water again.
- Repeat the rinsing steps until the pulp and gunk is all gone and all that remains are seeds that sink to the bottom of the jar. Once the water is clear, drain the seeds in a mesh strainer.
- Spread the seeds to dry in a single layer on parchment paper. Put this in a dry, warm place away from direct sunlight. (You can put this on top of refrigerator like you did for the fermenting stage)
- The seeds should be fully dry in 2 weeks. Occasionally, try to mix or move the seeds around to allow for even drying.
- Store the tomato seeds in a ziplock bag or envelope and put them with your other seeds, in a cool and dry place.

Common Tomato Problems and Solutions
While tomatoes can be pretty easy to grow, if they get a disease or pest problem, it can ruin your entire tomato harvest for the year. So I've put together a list of the most common tomato problems and what you can do about them.
Why did my tomato plant get blossom end rot?
Blossom end rot is when the bottom of the tomatoes on the plant develop dark brown or black sunken spots.
The main reason for blossom end rot is a calcium imbalance. Calcium is absorbed into the tomatoes through water. If a tomato grows too quickly or if something else makes the tomato have slower water absorption, not enough calcium gets to the fruit.
Here's a list of things that can cause calcium imbalance:
- Cold soil temperatures
- An intense heat wave
- Damage to the tomato plant roots
- Inconsistent watering
- High nitrogen levels in the soil
Unfortunately, once blossom end rot signs appear in your tomatoes, it cannot be reversed for that particular tomato. However, there are some things you can do to prevent issues for your future fruit:
- Pick off the ruined fruit so the plant can focus energy into new future fruit that might not get blossom end rot.
- Boost your soil's calcium needs with a quick-release organic lime fertilizer.
- Mulch around your plants to help keep the soil a more consistent temperature and moisture-level.
In your future gardening seasons, keep these things in mind to help your tomatoes stay free from blossom end rot issues:
- Next year, don't put out your tomato plants too early to avoid cold soil.
- Plant your tomato plants with a scoop of crushed eggshells or good-quality wood ash for a calcium boost.
- Gradually harden off your young plants before planting so they get better used to extreme soil and air temperatures.
- Consider using soaker hoses or drip irrigation to keep watering consistent throughout the growing season.
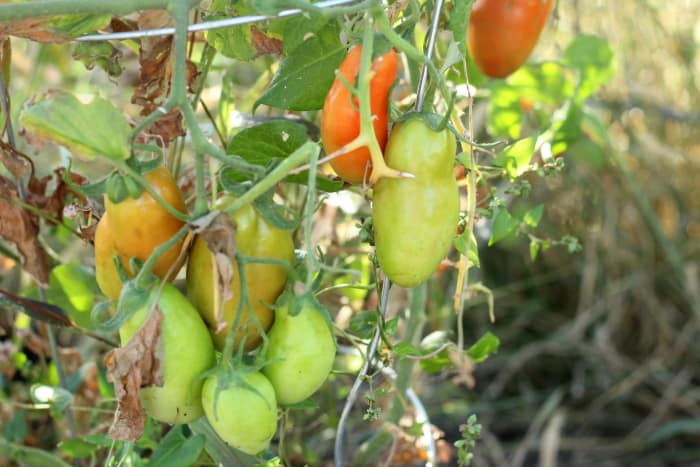
Why are my tomato plant leaves turning yellow?
There are a few reasons for yellow leaves on your tomato plants.
- Nutrient deficiency. If the nutrients are balanced for your tomatoes, they can indicate this in the coloring of their leaves. Yellow leaves often indicate that your tomatoes aren't getting enough nitrogen. Try using an organic tomato fertilizer to boost the nutrients in the soil (too much nitrogen can also cause problems, so a gentle overall tomato fertilizer might be best).
- Blight. See my suggestions (below) for dealing with tomato blight.
- Septoria Leaf Spot. A different fungus issue than blight, this is seen as yellowing leaves with tiny black dots. Remove the affected leaves (and do not compost them).
What can I do about Tomato Blight?
Tomato blight is a fungal disease that attacks your tomato plant's leaves, stems, and fruit.
Preventing Early and Late Tomato Blight
There are a few ways you can lessen your chance to have tomato blight issues.
- Tomato varieties: make sure you plant varieties that grow best in your area and climate. If you are often struggling with blight in your tomatoes, you can look for blight-resistant varieties to try growing. You might also want to experiment with range of tomato varieties that mature at different times, so you can compare/contrast whether your early mature varieties or later mature ones do better where you live.
- Crop rotation: plant your tomatoes in different spots or raised beds in your garden every year. Since all garden plants have different needs, crop rotation can help keep all of your plants healthier by actually taking advantage of the different things different crops put into the soil. Try moving tomato plants to the place in your garden where you grew beans or peas last year. Legumes add nitrogen to the soil, and the tomates love that.
- Better spacing: make sure to properly space your tomato plants. If you squish them together, less wind/air can move through the plants, leaving them vulnerable to blights and other health issues.
- Specific watering: Only water at the base of the plant. Excess moisture on the leaves can encourage blight. Try removing lower branches that touch the ground, too, to help prevent extra water to hit any of the leaves.
Treating Early and Late Tomato Blights
When you find blight starting on your tomato plants, immediately remove (and do NOT compost) the infected leaves. It can spread quickly to the rest of your plant, but if you catch it quickly and get rid of the infected parts, your tomato plant might still be okay.
If the blight is still progressing despite fixing your best efforts, you can treat them organically with a copper fungicidal spray. You can also fight fungus with a homemade organic fungicide. Underwood Gardens has a recipe for all-natural fungicide that reportedly works better than even commercial products. Simply combine 9 cups of water with 1 cup of milk and spray this mixture liberally on the plant.
Why are my tomato leaves curled and why do the plants look unhealthy?
Unfortunately, one of the major reasons for curled tomato leaves an unhealthy tomato plants is if you used a compost or mulch that was heavy in pesticides. Check out my super-sad post about how I poisoned my tomatoes and garden for more details.
Why did my tomatoes split?
Tomatoes split open if the inside of the tomatoes grow too fast for the skin. This often happens when they receive more water than normal. If your plants have a dry spell followed by tons of water, it puts too much pressure on the tomato, resulting in the split.
Try to evenly water your tomato plants to prevent this issue. And m ake sure you harvest and eat the split tomatoes right away or they can attract diseases or pests.
Bonus Tip: Watch those chickens!
I learned the hard way last year that my free-range chickens L-O-V-E tomatoes… There is nothing more disappointing than to reach for a big, juicy tomato, only to discover that its backside has been gored by a chicken beak…
When my tomatoes were ripening last year, I ended up locking my hens up for a couple weeks. They weren't too thrilled with me, but hey– tomato sauce is a priority around here.
And of course, you can probably follow none of these tips and still have a good chance of growing tomatoes for a bountiful harvest. But, since my beginner's luck has officially run out, I've started implementing these tips and I'm having much more success at growing tomatoes. If you do have a bumper crop, you may want to invest in a tomato press for all that sauce you'll be making.
Listen in for more tomato info on one of my latest podcast episodes, or find my Old Fashioned on Purpose podcast on your favorite podcast player.
My Tips for Preserving Tomatoes:
- How to Can Tomatoes Safely
- Homemade Sun Dried Tomatoes
- How to Freeze Tomatoes
- Fast Tomato Sauce Recipe
- 40+ Ways to Preserve Tomatoes
- Creamy Tomato Garlic Soup
- How to Ripen Green Tomatoes
How to Get Rid of Tomato Blight Naturally
Source: https://www.theprairiehomestead.com/2013/06/10-tips-for-a-tremendous-tomato-harvest.html
0 Response to "How to Get Rid of Tomato Blight Naturally"
Post a Comment